Monday, October 31, 2011

Day 306 and the Scare-ff


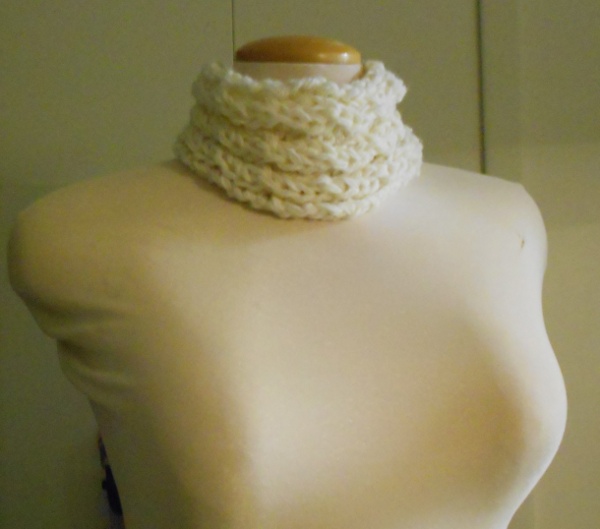
It's Halloween! Sooooo Spooooooky! This scarf may look plain white when you're not trying to be scary, but flip it over and BOO! A scary ghost face!

Alright, it's not that scary, but it is really very cute and the face is quirky and not too big so that it's appropriate for adults as well as kids.

I used one big baby blanket sized skein of baby weight (light sport weight) yarn and had a bunch left over.

Set up row: Chain 17, DC into the 4th and every following chain.
Repeat this row over and over: Turn, Chain 3, DC into the second and every following stitch including the turning chain.

It's just plain old double crochet the whole way down except for the little scallops at the end to look like the ghosts sheet flapping in the wind. Do this 3 times on each end: Chain 1, SC into the first stitch, Skip 1, TC 5 times into the next stitch, Skip 1, SC into the next stitch. Omit the Chain 1 fr the following 2 scallops and tie off after the third.

Now you need eyes and a mouth which is done with simple magic circles. Make a loop around your fingers and make 6 Single crochets into the loop. Pull the end tight to close the hole. slip stitch into the beginning sc to close the gap. Chain 1, and make 2 single crochets into each stitch and once again make a slip stitch to close the gap. Make three and sew them onto the scarf for a cute spooky face.

Sunday, October 30, 2011

Day 305 and Ponchette


Hey look! Kevin did my photo cropping today! He likes to help a little

I remember back when Martha Stewart did jail time. I can't remember why she did, but I do remember the gigantic poncho she wore when she was released. As I recall, a fellow inmate made it for her as a celebration/happy parole gift. Any crocheter who saw it immediately knew how to make one of their own.

Since a poncho isn't a scarf, I made my own smaller scale version. It's just a rough recipe, but if you're not a granny square virgin, it should be easy enough to pick up.

I used a size K hook and worsted weight yarn and used a base of 80 stitches. I did the basic granny stitch 10 times and made a corner. Then I did it again. That was the end of the round. I just repeated until I got a wide enough shape that it made me happy.

As long as you do the basic granny stitch and have only 2 corners rather than the usual 4, you'll end up with a poncho shape instead of a flat motif.

Saturday, October 29, 2011

Day 304 and Rugby


Here's one for the non-knitter, non-hookster that anyone can do. If you don't know how to do a basic three strand braid, just ask the first person you see with hair that passes the shoulders. It's like a global law that folks with long hair must know how to braid.

Anyway, I used 9 braids each with 6 strands. The strands were cut about 2 yards/meters long. Once I had all of them braided, I used all nine strands together as a 3 strand braid held multiple. I kept them as flat as possible, but if you really want it to hold the nice flat braid shape it would be a good idea to sew a straight line across every 4 or 5 inches. You'll need to sew across the very top and the very bottom anyway as the easiest way to secure the braid in place.

Friday, October 28, 2011

Day 303 and Dealies


I made some very strange little sloppy pom poms out of frogged yarn and since it was acrylic, I couldn't condition the curls out. They're actually pretty cute and just need a little brushing out. I didn't want to go through the trouble of attaching them all so instead I made the ties very long. By holding the ties along with the working yarn I was able to secure them without any sewing at all by holding the ties in with the working yarn and letting the sloppy poms fall wherever they landed.

Thursday, October 27, 2011

Day 302 and Kits

kits

I'm really trying to learn a little more about color and how to make things "go." A good way to learn, I decided, was to go to the experts by way of a kit. While you could buy a kit to make something specific, you could just as well get a kit to make an afghan and make a scarf or a sweater instead. Don't look for just knitting or crocheting kits either! Interesting crewel embroidery kits often have really lovely wool floss and things like latch hook rugs have the rug yarn already cut into nice even fringe pieces. Think outside the plastic commercial bag!

What you see isn't actually a kit for a scarf. In fact, I don't know what it was intended to be a kit for in the first place. The yarns all came in a commercial looking bag, but the instructions were gone as well as any other parts of the kit other than yarn and some clipped ends.

The colors looked a bit like it was supposed to be a harvest witchy pillow, but I suppose I'll never know. I do rather enjoy the end result. The big color blocks seem to flow so much better as gradually changing color families and the chevron gives it some movement and an interesting texture.

Size 15 needles
aran weight yarn (or sport weight held double)
tapstry needle

Cast on 19.
Row 1: Knit front and back of first stitch, K8, Slip 2 together, Knit 1, pass both slipped stitches over, K8, Knit front and back of last stitch.
Row 2: Knit across.

Repeat until you're happy with the length, changing colors as often as you see fit. Bind off.

Wednesday, October 26, 2011

Day 301 and Crossed


I'm still having trouble keeping tunisian (afghan) crochet from curling at the edges. I couldn't cure it completely but by stitching the beginning to the end offset so that the edges are connected instead of the ends, I not only had a little bit of help from the dreaded curl, but also had a much larger area in which to place a cross-stitched design.

Kevin has been asking me for a while if he could help with a scarf. Cross-stitching is a hobby of his and this scarf gave him a nice big canvas on which to place a picture. If you've ever played Oregon Trail, you'll recognize this gun toting figure. All around the cowl, there are the poor critters that will be his meal ticket. Leave it to my man to come up with something so quirky. It almost looks like the little hunter is aiming at the wearer for his next capture!

Tuesday, October 25, 2011

Day 300 and Cirrus


It's another milestone day and I named this after a cloud because hitting a milestone puts me on cloud nine! (Yeah, that's right, I brought out the cheese on that one.) This was outrageously easy, but the border gave me a bit of a headache because there seems to be no way to do this without constantly revolving your yarns around each other.

The gist is it's a plain DC stitch cowl with a linking chain border.

Chain 50 with a size P hook and yarn of a matching weight.
Make a ring with a slip stitch to the first chain.

Chain 3, DC in every chain, slip stitch to the 3rd chain at the beginning of the row.
Chain 3, DC in every stitch, slip stitch to the beginning chain to connect the row.

Continue until you have the width that you want (I did 5 rows).

Now pick a contrasting color. You will be working both colors at the same time. Chain 5 in the main color, skip 1 stitch, SC into the next stitch. Remove the hook from the loop and join the second color in the skipped stitch. *Working from behind the previous loop, Chain 5, SC into the first available empty stitch. Again remove the hook, this time pick up the opposite color and repeat from *. You'll have to take time to untangle your yarn balls every few stitches as they will be twisting around each other. I think the result was worth it.

Monday, October 24, 2011

Day 298 and Studfinder


I made this using a very easy and clever technique that most people refer to as built in i-cord. Basically, the stitches over which your icord is to be worked are only done on the right side of the fabric. On the wrong side, all the stitches of the i-cord are slipped with the yarn in back. The slipping causes the cords to be pulled tightly and give vertical dimension and because they are always slipped, they appear to be knitted.

I have found however that this technique works best with fabrics that have a lot of vertical stretch such as garter stitch or moss stitch, otherwise you may find yourself with rippling fabric where you didn't want it.

Sunday, October 23, 2011

Day 297 and Trick or Treat


Just when I think I've dabbled in every technique there is, something new turns up.

This is called interlocking crochet, woven filet, double filet, or double sided crochet among other names, I expect. It's truly fascinating! The idea is that 2 filet crochet meshes are worked at the same time offset in such a way that the crosses of one layer appear through the windows of the other layer. By sometimes working stitches through the mesh of the opposite fabric, interesting patterns can be made. Amazingly, I would call this an advanced beginner technique despite looking so very advanced.

I pulled this pattern stitch from Interlocking Crochet which I think is best called a stitch dictionary just for this technique.

The coolest part is that in this photo you see a grid of orange with black windows, but if you were to turn this scarf over, it would look like an entirely different piece! On the other side, it's a wash of black with orange crosses.

Saturday, October 22, 2011

Day 296 and Trapped


I've seen plenty of this very clever technique and plenty of ways to execute it as well. I for one am lazy and did it this way:

With my size 11 needles I made an 8 stitch garter strip that was twice as long as the cowl that I wanted. Then I arranged the strip into the shape you see here. It's basically a moebius strip but twisted and doubled. I sewed the doubled area together and the overlapping parts then appear to be trapped in the gap made by the opposite side.

I've also seen this done by making a strip exactly the width you want it, but by splitting both ends and sewing them around each other. Either way there is some sneaky sewing involved. Maybe someday someone will invent a way to do this seamlessly, but it doesn't look like today is the day nor am I the one to do it! Still, I can be happy with what I made and just keep on waiting.

Friday, October 21, 2011

Day 295 and Color Correction


I love to find yarn in thrift shops. Sometimes I get lucky and find balls of yarn with the bands still on, but sometimes I buy a sweater with the intention of ripping it up and harvesting the yarn. Other times and this is much more rare, I find half finished projects. Many thrift shops that I frequent don't even put these out on the floor and the donated half thing is just sent to the bin. If I can find them, I usually snag them up and they are often much easier to take apart than a finish sweater. This one was definitely an exception.

Here's what the fabric looked like before I started messing with it.
You can't tell very well from this photo, but the yellow is ruining the whole piece. It's a bizarre neon shade that completely detracts from the three otherwise nice neutral colors. Another couple of cons for this monster: It's acrylic and it's made with many strands held together. Now, there's nothing wrong with modern acrylic. It's much softer than counterparts made decades ago and it's very machine friendly, but this one was a little older than I usually accept. As for holding many strands together, again there's nothing wrong with it, but pulling it apart is where the problem lies.

Frogging a single strand of something is no problem at all. YOu wind it into a ball or a skein as you go and you're ready to recondition and use it. If there's more than one strand though, you pretty much need as many other people helping you as there are strands in the fabric. This one had 4. I have some very generous helpful friends, but I suspect they no longer would remain so if I asked them to help me undo this ordeal. All those strands tend to braid around each other as you knit so pulling them into separate balls was darn near impossible.

Instead I figured I try to correct the color somehow. Since I can't remove strands from the beast, I'd add strands until it no longer offended my delicate constitution. One more brown and two greens later and I wasn't puking. Granted, I built some muscles handling fabric made from seven strands of yarn at the same time, but it sure is thick and warm!

Chalk this one up to my extreme pig-headedness.

Thursday, October 20, 2011

Day 294 and Cufflinks


Just because I don't have enough yarn for a nice long scarf doesn't always limit me to keyhole scarves and cowls. For this project I made a very simple double crochet rectangle. It fits snugly around the neck as long as there's something cinching it together. In this case I took a coordinating yarn and made a cufflink with fat yarn buttons and a thick chain link. Since the cufflink is separate, it can be placed absolutely anywhere on the length of the scarf so this might double as a faux vest or a dickie depending on what you wear with or over it.

Wednesday, October 19, 2011

Day 293 and Ball Band


I make an effort not to be a snobby knitter/crocheter and yes indeed it does require effort sometimes. The biggest brand names in yarn have huge websites and thousands of patterns that have been designed specifically for use with their yarns. These patterns are given away for free in the hopes that the crafter will buy the exact yarns called for in the pattern. It's a very clever marketing technique, but also it's very generous and most folks have no scruples whatsoever about using whatever yarn they see fit to use.

This is the type of pattern that would come on a Ball band and I make an effort not to scoff just because the humble pattern is on the inside of a curled piece of paper.

Size P hook
1 ball Wool Ease thick and Quick from Lion Brand
Tapestry needle.

Chain 135. (or any multiple of 4 +3)
Row 1: DC into the second and every following chain.
Row 2: Chain 3, turn. Dc into the second stitch. * skip 2 sts, 1 Trbl into the 3rd and 4th stitches, then crossing the stitches in front work 1 trbl into each of the skipped stitches* repeat to the last 2 stitches, DC2.
Row 3: Chain 3, turn. DC into the second and every following stitch.
Weave in ends.

Tuesday, October 18, 2011

Day 292 and Complimentary


Now that it's getting to the end of the year, I sometimes worry that I'm overthinking things. I do so much that is so simple and an equal amount that is so original and unique. I think I glance over the middle ground quite a lot of the time.

So here we are, middle ground. I didn't overlook you hanging out at the center of things! A nice bit of fleece with some holes poked all around the edge for a very easy crochet and chain border. The holes were too far for 1 chain to be enough but too close for 2 chains to lay flat. I went with two and was pleasantly surprised at the faux picot it made. A quick consult with the color wheel gave me a bright but basic complimentary color match.

Monday, October 17, 2011

Day 291 and Mirror Lake


So pretty! This is a free pattern that can be found not only in ravelry's library but also on Caron's pattern pages. I found this to take a lot more time than expected and I think it's because I rarely make crochet that's so darn big! I used panda cotton here and it's amazingly drapey. I think that's saying a lot because crochet is notorious for being stiff. It's all in the gauge and the material though.

Sunday, October 16, 2011

Day 290 and Planarian


It took me FOREVER to figure out the name of the plucky little animal that this scarf reminded me of! There's a brief glimpse of a very colorful example in Finding Nemo of a strange fishlike animal with one ruffly fin going all the way around its body. Turns out it was a Planarian or a Flatworm. Who knew something as unappealing sounding as flatworm could actually be so colorful and lovely?

Saturday, October 15, 2011

Day 289 and Fiyero


Kevin has been reading Wicked by Gregory Maguire. It's quite a good read, moves along at a fair clip, and yet not a fluffy piece. (I shamelessly admit needing to look a word or two up in the dictionary once every third chapter or so.) While I feel there is a lot of excellent descriptive writing throughout the book, every once in a while there is a phrase that catches my imagination a little better than the rest.

Fiyero is the shortlived love interest of the heroine and is describe as having diamonds decorating his skin. Well of course I had to emulate that somehow! I used yesterday's improvised "pattern" and repeated only the increase and decrease portions. You can't tell from this photo, but there is a metallic element to the yarn that makes the diamonds sparkle just a bit. I'm rather pleased with this decorative submission.

Friday, October 14, 2011

Day 288 and Calico


Over here in Ohio, I'm still using up the tribble-like accumulation of acrylic eyelash yarn. Happily some of it is of lovely natural looking colors. If it's going to look furry, I prefer colors that occur in fur.

I was also interesting in crocheting some of it. Fur yarn always amuses when knitted, but often loses the charm in crochet. Knitting isn't nearly as looped up and knotted as crochet is and all those knots trap the lashes and prevent them from fluffing up easily or sometimes at all! Remedy for the situation is to use a larger sized hook, and boy you really have to level that hook up to make a difference. I had to use a size P hook and 3 strands before the fur stayed as fluffy as I liked.

Thursday, October 13, 2011

Day 287 and Bites

I'm still not good at colorwork, but when it's in chunks and squares I can handle it. Every color here has a bite of another color taken out of it.

Get ready for a recipe rather than a pattern!

Size M hook
Worsted weight yarn in various colors
Tapestry needle
(American abbreviations)

Chain 12. DC into the 4th and every following chain. (10 stitches, turning chain counts)
*Work 3 rows even. (chain 3, DC into second and every following stitch)
For the fourth row, chain 3, DC into the next 3 stitches. Work the first half of a DC into the next stitch changing color for the final loop. Finish the row in the new color.
Begin the next row in the new color, changing back to the original for the 5th-10th stitches.
Work 3 rows even.*

Repeat between the ** changing colors as you like. If you want to change the side the bite is on, just work 2 rows at the beginning of the block instead of 3.

Wednesday, October 12, 2011

Day 286 and Shawl


I was thinking that I would make a shawl collar without the attached sweater or cardigan. As I was sewing, it occurred to me that a shawl collar is actually nothing more than a moebius forced to stay flat at the front! If you have a moebius that you're no longer enamored with, maybe a couple of quick stitches to create a sharp front is enough to give it another season of wearability!
.
I don't think a pattern is necessary, but the basic recipe is to make a very short scarf. Wrap it around your neck and overlap the edges so they match perfectly. Sew the two ends together as well as about an inch up each side and call it a day.

Tuesday, October 11, 2011

Day 285 and Desperation


I happened to have this partially finished item in my stores. The original maker apparently was making a housecoat or a driving coat with this crazy thick fabric (4 strands worsted on size 15 needles-- my hands hurt just thinking about making a full sized project that way!) but for one reason or another never finished. I gathered the partially done bits at a garage sale for just a dollar and have been putting off frogging the whole thing out of plain laziness.

Well today I went to work at my normal time and after 2 hours was told to head home and get rest because I was needed for a different shift later in the day. Extremely inconveniently, I did as I was told wondering how I'd manage to finish a scarf for today when I remembered these pieces. The back panel was roughly rectangular and all I had to do was bind off. I did just that and sewed the two opposite corners together for a very snug kerchief scarf.

Monday, October 10, 2011

Day 284 and Rachet


This is yet another way to make less yardage into something more. Interestingly, this scarf is really only half as wide as it appears. I cast on 20 stitches and worked for about 7 rows, then bound off 10 and finished the row. On the following row, I cast on 10 at the end.

So even though the scarf was 20 stitches wide, it can be a lot shorter as far as rows go and be a lot longer when draped. The big cast off areas cause the fabric to stretch and angle out for the length. Interesting!~!

Bonus: The big gaps fit together like cogs so a short scarf hooks onto it self and doesn't fall off.

Sunday, October 9, 2011

Day 283 and Oomph


Okkay so enough fluffy novelty stuff is too much, right? Yet, I still have soooo muuuchhh left in my stash! I went with hairpin lace today. It doesn't use up as much yardage as straight crocheting or straight knitting so I was able to finish the whole thing with the scrappy bits of novelty without having to change textures partway. I gave it some substance by framing it with something smoother and in a highly contrasting color (ooo, silver!).

It took next to no time (about an hour and change with a P hook) making it a cinch for last minute gifting.

Saturday, October 8, 2011

Day 282 and Striation


Same yarn as yesterday, different scarf! Taking advantage once again of the long color repeats but this time with crochet makes a much blockier looking result. Because crochet is made one tall stitch at a time, the color lands in chunks rather than stripes. An easy repeat like this shell stitch shows it off to good effect. Anything lacier and it might have looked much more disjointed in a much less appealing way, but you can't really know unless you try it. Maybe I will! I do have nearly three more months to go!

Friday, October 7, 2011

Day 281 and OnePiece


Here's a weird one with a very unique result!

I took a piece of fabric that's been in my stores forever and decided to put it to use. It's once thing to make yarn out of fabric strips, but in this case I didn't make strips. I only made slices in the fabric. Now because a column of knitting is only concerned with the other stitches in its own column, I was able to work stitches as if it were a run in the fabric or a dropped ladder. At the top, only the furthest left edge needs to be cut to secure the bind off in the normal way.

Since the edges are not stitches but a fabric edge, a very interesting ruffled effect is created. Because I used stockinette, it curls, but as you can see in the photo, this just allows the scarf to have two sides. On one side is the raggy knit look and on the other side is the ruffle.

Thursday, October 6, 2011

Day 280 and PieceNoWork


At a quick glance one might think that this was patched together from various smaller swatches, but what's actually happening here is a very long color self striping yarn being used to trick the eye. Every time the color changed, I also changed the texture. As a result, each color looks very disjointed from the color before and after it.

I held two yarns together here and had to employ some interesting possibly improvised techniques. I lined up the color changes as best I could as I started, but not every change perfectly matched with the changes on the other ball. On these occasions, I pulled the strand that wasn't changing yet forward until it looked as if it would match the other ball. Then with the big loop I just made, I went ahead and kept knitting. Many times I ended up right where i needed to be, placed the final loop on the needles and picked up the yarn from the row below which now matched and continued knitting.

Wednesday, October 5, 2011

Day 279 and Plumage


There are a number of novelty yarns out there that are specifically designed to be split rather than knit normally so that the mass of the ribbon/mesh/tape is slightly gathered and free to make a substantial ruffle. Can-Can, Ruffle and Flounce yarns all come to mind. And while I think it's a clever idea, I also think that enough is probably too much. So for my ruffly scarf, I used a little less ruffle and a little more of a similar colored smooth yarn to break up the effect.

The trickiest part was using the right ratio. After a few frogs (and tape yarn frogs very easily by the way) I found that three rows of smooth yarn and one row of ruffle suited me just fine. Since a single row would end the working yarn at the wrong end, I had to work with a circular needle so as to slide the work to the other end to make the working yarn available once again. That was the only real hang up. You could also use a long enough double pointed needle or even a pair of straights as long as you don't mind slipping an entire row every 4th row.

Tuesday, October 4, 2011

Day 278 and Mockery


I love cables! Since not everyone feels the confidence to do them just yet, a two stitch twist is a perfect transition to technique or just a nice fake when you don't have the third needle.

I can't say that this is the best representation. The texture disappeared a little more than I was expecting. But anyway, it's easy to do with a little practice. There are a number of ways to make a twist including working the second stitch followed by the first while both stay on the needle. You can also knit two together again keeping the stitches on the needle, then knitting the first stitch a second time. It makes much more sense if you actually execute it. Once again, I recommend youtube to see it in action. Search for twist stitch or twist cables.

Monday, October 3, 2011

Day 277 and Firewood


It just looks rugged and homey doesn't it? So a nice ribbing looks great, and a nice ribbing continues to look great when rotated a little bit, don't you think? On its side, this 3 by 3 rib reminds me of stacked up firewood. I used a natural fiber here (alpaca) and a thick needle (size 15). It was fast, it requires no pattern at all except to cast on a number divisible by 6 and to knit until you can't knit any longer.

Sunday, October 2, 2011

Day 276 and Duckies


Let's say you have a very small amount of yarn and want it to go a long way. There are lots of ways to make your yardage go a long way and this is just one of them.

There's no rule that says a scarf has to be the same width along the entire length. A good cheat for making a scarf look more substantial is to make it slender around the neck and making the hanging parts much wider. Here, I started with 15 stitches at the ends and did a mitered corner until only 5 stitches remained for the longer body of the scarf. Because I wanted both ends to match, I made two beginnings and seamed the center.

Saturday, October 1, 2011

Day 275 and Tweed


I love a nice barberpoled yarn (the stuff with plies of vastly different colors so that one color looks like it's a barber pole with the color winding around and around). I think it's the perfect type of yarn to use for a clean lined basic stockinette stitch item. The color lends texture to an otherwise smooth fabric, and you're using it to best advantage since more detailed stitch patterns would be lost in the color variation.

I also noticed that I haven't done hardly any BIG cowls. I'm generally a fan of tightly snugged cowls that mess your hair up when you pull them over your head, but I can see how a bigger cowl that can be twisted slightly and tucked into your coat has its own appeal. I went with a nice basic garter and stockinette squares motif. Basically, work garter stitch along the edges, stockinette int he center and break it up with a horizontal line of stockinette spaced evenly for something handsome and unisex.